
Home | Privacy Policy | Disclosure | Terms of Service | DMCA | Contact
The Self-Sufficiency Network Copyright © 2023
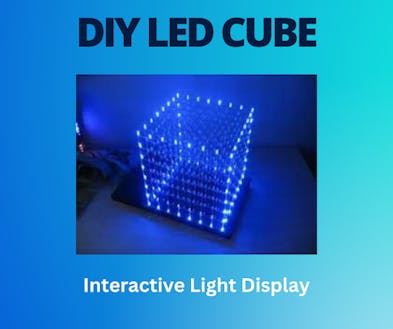
DIY LED Cube - Interactive Light Display
By The Self-Sufficiency Network
Introduction: This electronic DIY project will guide you through the creation of an LED Cube, a mesmerizing interactive light display that will light up your room with stunning patterns and animations. With just a few basic electronic components and programming skills, you'll be able to build this eye-catching LED Cube that can be customized to suit any occasion
Filled Under: Off The Grid
Materials Needed:
- 64 LED (light-emitting diode) cubes (4x4x4) - Common Cathode
- Arduino Uno or compatible microcontroller
- 16 x NPN Transistors (e.g., 2N2222)
- 64 x 220Ω resistors
- Breadboard or PCB board
- Jumper wires
- Soldering iron and solder
- USB cable for Arduino programming
- Acrylic or wood for the cube frame (optional)
Instructions:
Preparing the LED Cube: a. Assemble the 4x4x4 LED cube by soldering the LEDs together, ensuring they have a common cathode. Use a clear acrylic or wooden frame to hold the LED grid securely in place.
Wiring the LED Cube: a. Connect the anodes of each LED layer (4 in total) together and label them as layer 1, layer 2, etc. b. Connect the cathodes of each LED column (16 in total) together and label them as column A, column B, etc. c. Use jumper wires to connect each LED's cathode (negative) to a 220Ω resistor. Then, connect the other end of the resistors to NPN transistors' base pins.
Connecting the Arduino: a. Connect the collector pin of each NPN transistor to the Arduino's digital pins (D2 to D9) using jumper wires. b. Connect the emitter pin of each NPN transistor to the Arduino's GND pin using a common ground. c. Use another set of jumper wires to connect the Arduino's digital pins (D10 to D13) to each layer of the LED cube.
Uploading the Code: a. Install the Arduino IDE on your computer if you haven't already. b. Download the LED Cube Arduino library or use a pre-written code available online. c. Open the code in the Arduino IDE, select the correct board (Arduino Uno), and upload the code to the board.
Testing the LED Cube: a. Once the code is uploaded successfully, the LED Cube will start displaying various patterns and animations. b. Interact with the cube by programming different patterns, colors, and animations.
Customizing the LED Cube: a. Experiment with different patterns and animations in the code to personalize the LED Cube's display. b. Add a push-button or potentiometer to control the animations interactively.
Conclusion: Congratulations on building your LED Cube! This electronic DIY project will not only impress your friends and family but also allow you to delve into the world of electronics and programming. With creativity and a little tinkering, you can continue to enhance and modify your LED Cube, making it a unique centerpiece for any occasion or setting. Happy coding and enjoy your mesmerizing LED Cube!